Hi again! Eduardo Rodriguez here with a newish way to use fonts in Android! Before we start, remember to check my previous post about video compression.
So, it seems that this piece of info I’m going to share with you it’s not that new. However, as a developer who has been working with Android for almost 8 years now, it just blew my mind.
So far, the only ways I knew to set custom fonts in my Android apps were these two:
- Getting every single view I wanted to customize the font to and set the Typeface manually on my Java/Kotlin class (Very difficult to maintain and a total mess on the classes)
- Generate an extended class for every component I wanted to set a custom font for and handle them to set the typeface so I can use them on the XML layouts (No that difficult to maintain and a little bit straight forward)
As you can see, maybe these two ways are not very complex. However, they are not the fastest nor as efficient that we can get, are they?
Another disadvantage of these two methods is that you cannot see the custom fonts on the preview, maybe that’s not as important but still. If you ever got into this before, you will understand my surprise when I ran into this improved way to use fonts.
Let’s get to it.
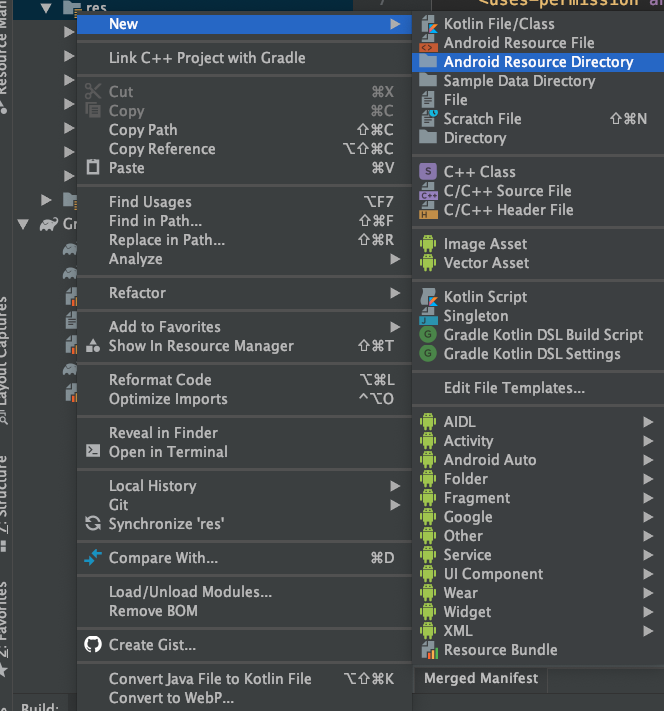
First of all, what we need to do is create a new resource directory in our res folder by right-clicking on it, then we go to New -> Android Resource Directory
Now when we select the option, a new window will appear, where we are going to select the Resource type font.
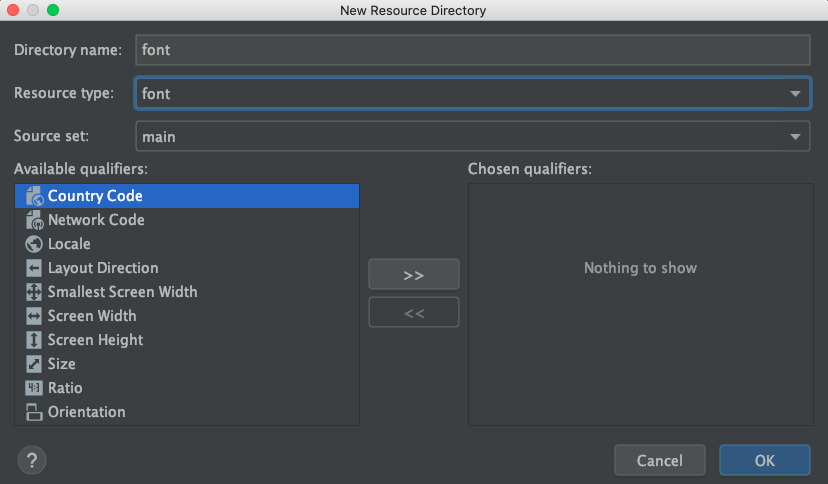
After these two steps, we have created a font folder in our res directory.
The next step is to add the fonts we are going to use to our new font folder. One little tip, be careful with the naming of the fonts. Android Studio will only recognize lowercase and underscores.
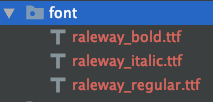
Now we have our fonts in our project and ready to use.
So what’s next? Is that it?. Well, not quite.
Before we can actually use them, we need to create a font family. To do so, we are just going to right-click on our font folder and go to New -> Font resource file
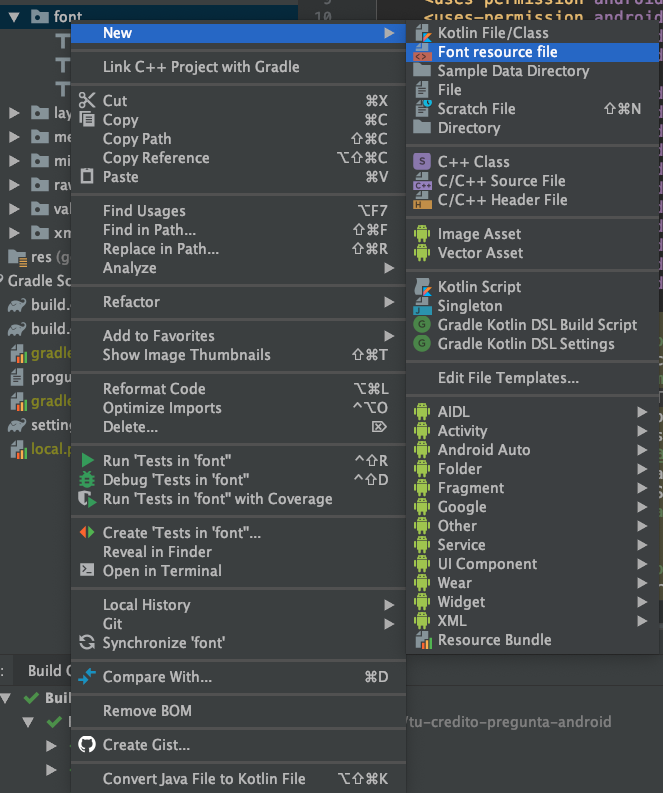
After that, a new window will appear so we can name our file.
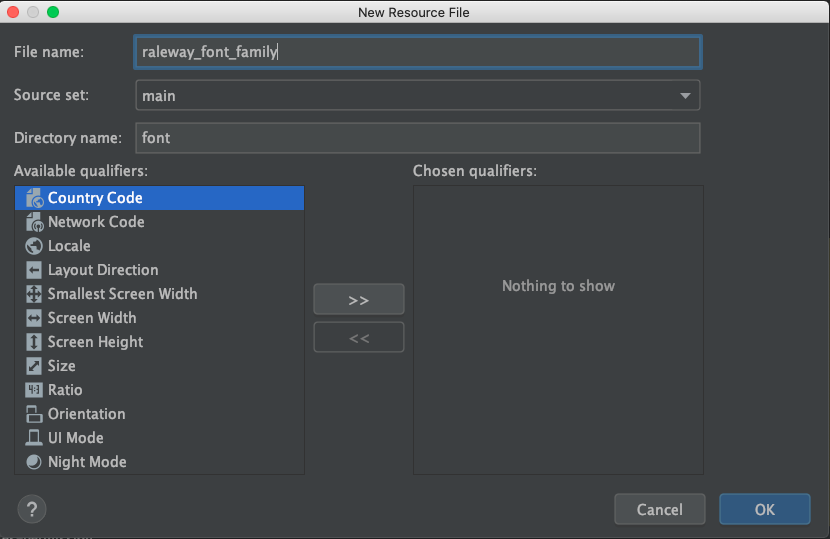
In my case, I called it raleway_font_family.
So now all we have to do is define our font family. Here’s an example of my final file:
<?xml version="1.0" encoding="utf-8"?>
<font-family xmlns:android="http://schemas.android.com/apk/res/android"
    xmlns:app="http://schemas.android.com/apk/res-auto">

    <!-- regular -->
    <font
        android:font="@font/raleway_regular"
        android:fontStyle="normal"
        android:fontWeight="400"

        app:font="@font/raleway_regular"
        app:fontStyle="normal"
        app:fontWeight="400" />

    <!-- italic -->
    <font
        android:font="@font/raleway_italic"
        android:fontStyle="italic"
        android:fontWeight="400"

        app:font="@font/raleway_italic"
        app:fontStyle="italic"
        app:fontWeight="400" />

    <!-- bold -->
    <font
        android:font="@font/raleway_bold"
        android:fontStyle="normal"
        android:fontWeight="700"

        app:font="@font/raleway_bold"
        app:fontStyle="normal"
        app:fontWeight="700" />

</font-family>
Now we are ready to go! We have three options to use our brand new fonts:
1.- Directly in our xml layout files:
<TextView
android:layout_width=”wrap_content”
android:layout_height=”wrap_content”
android:fontFamily=”@font/raleway_fonts_family”/>
2.- Programatically:
Typeface typeface = getResources.getFont(R.font.raleway_regular);
editText.setTypeface(typeface);
3.- In our style and app theme:
<style name="AppTheme" parent="Theme.MaterialComponents.Light.Bridge">
    <!-- Customize your theme here. -->
    <item name="colorPrimary">@color/colorPrimary</item>
    <item name="colorPrimaryDark">@color/colorPrimaryDark</item>
    <item name="colorAccent">@color/colorAccent</item>
    <item name="android:fontFamily">@font/raleway_fonts_family</item>
</style>
This last one is the best option for you if you are planning to use the same family font for the whole project.
As you can see, this is a huge improvement compared to the old ways. I hope you find this as helpful as I did. Here’s the link to the Google fonts page. Check it out. There are so many font options you can use to give your app a new look.